Discover some simple tutorials to get started with Photoshop.
If you are a beginner with Photoshop and want to start familiarizing yourself with this software, these few small tutorials are made for you.
If you do not have a mastery of Photoshop, consider looking for a graphic designer among our freelance designers.
Summary
- Photoshop CC Interface
- How to crop an image in Photoshop
- Remove imperfections from an image in Photoshop
- Using layers in Photoshop
- Saving an image in Photoshop
- Resizing an image for the web in Photoshop
- Automate your tasks in Photoshop
- Merge two images
- Crop an image
- Image processing: our best Photoshop tutorials
- Change the color of an object in Photoshop
- Cut out a clothing photo with Photoshop
- Remove an object from an image
- Blur a part of an image with Photoshop
- Change eye color in Photoshop
- Aging a photo in Photoshop
- Our Photoshop tutorials for your business
- Integrate a logo in perspective in Photoshop
- Emboss a logo on a t-shirt in Photoshop
- Create an animated logo with Photoshop
- Make a GIF in Photoshop
- Create a brochure with Photoshop
Photoshop CC Interface
In this first part, let’s explore the interface of Photoshop CC.
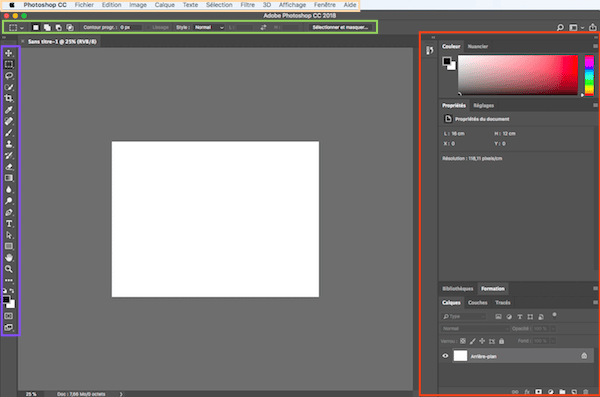
Upon first opening, Photoshop looks like this:
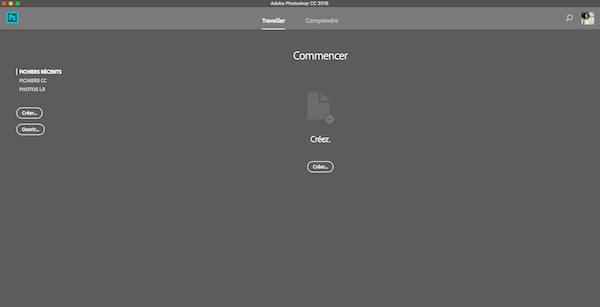
Click on the “Create” button to create a new document while leaving the default settings. This will allow us to see the various menus and palettes of Photoshop CC.
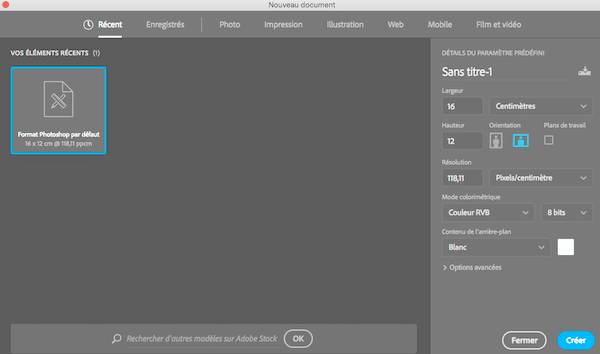
You will then find:
- In orange: the different menus
- In blue, on the left: the toolbox with all the tools you will need. Simply click on a tool to select it and the button will be grayed out.
- In green: The adjustable settings of the selected tool
- In red, on the right: floating palettes which are boxes that can be moved and contain management tools or settings regarding objects.
Now that you have a better understanding of the Photoshop interface, we will learn how to use it and perform various actions through the following tutorials.
Removing an image in Photoshop
In this first Photoshop tutorial, you will learn how to cut out an image in just a few clicks using Photoshop CC. You will see, it’s not that complicated and it is also essential to know for any graphic designer or web designer in the future.
- Start by choosing an image to cut out and open it in Photoshop CC
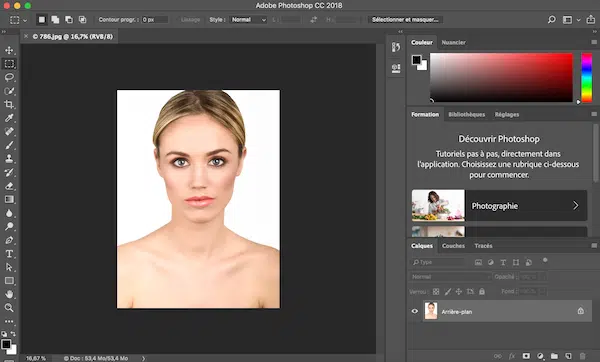
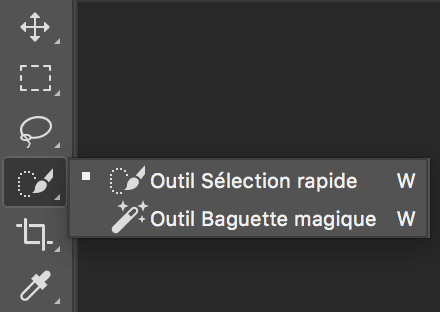
- Select the magic wand tool and click on the background of the image. Photoshop will automatically select the entire background.
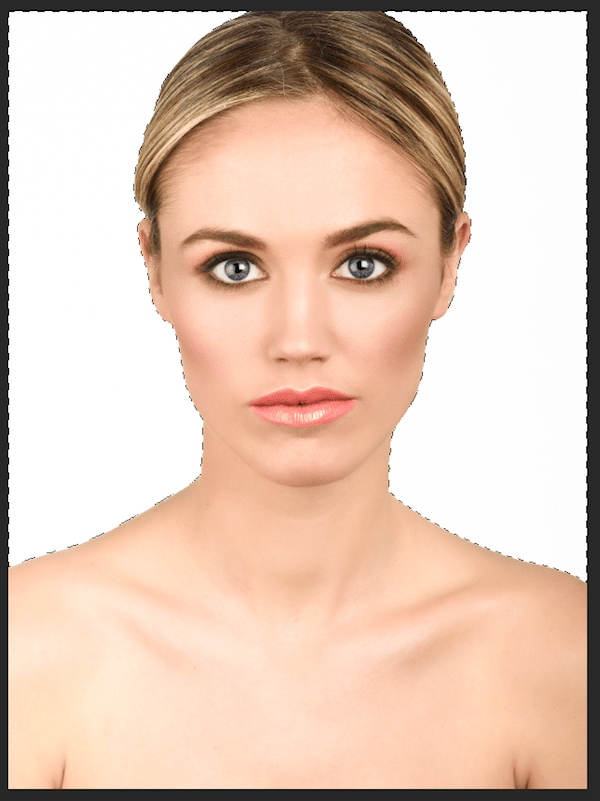
- Go to the “Select” menu and click on “Swap”, this will automatically select the image to crop
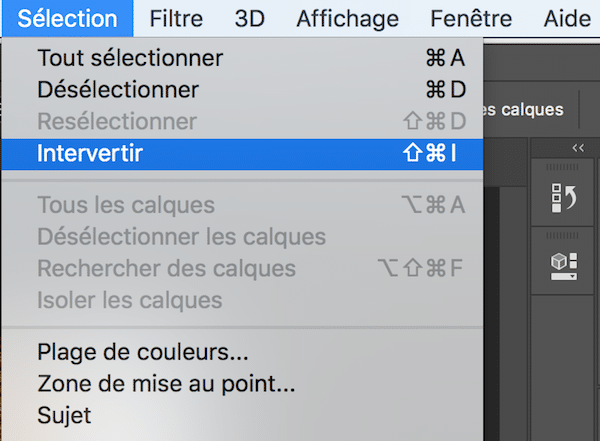
- Return to the “Select” menu and click on “Select and Mask”
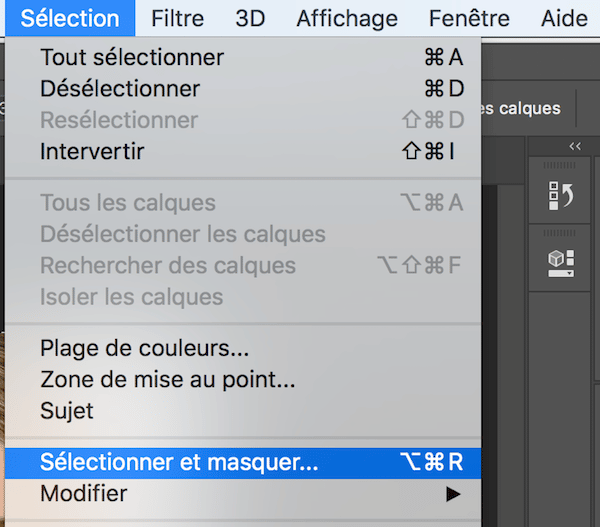
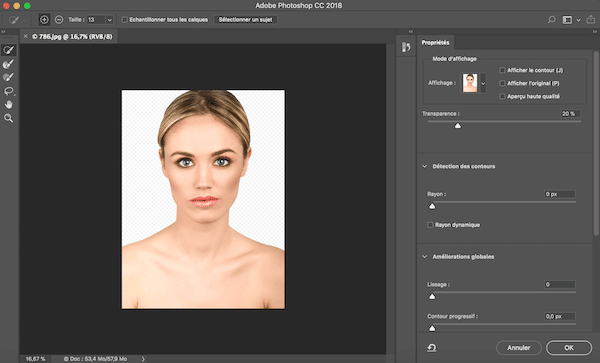
- In the window that appears, click on the “Refine Edge” tool and walk approximately around the image you want to crop. In our case, this will better select the hair of the young woman.

- To check your cropping, you can view your image on various backgrounds
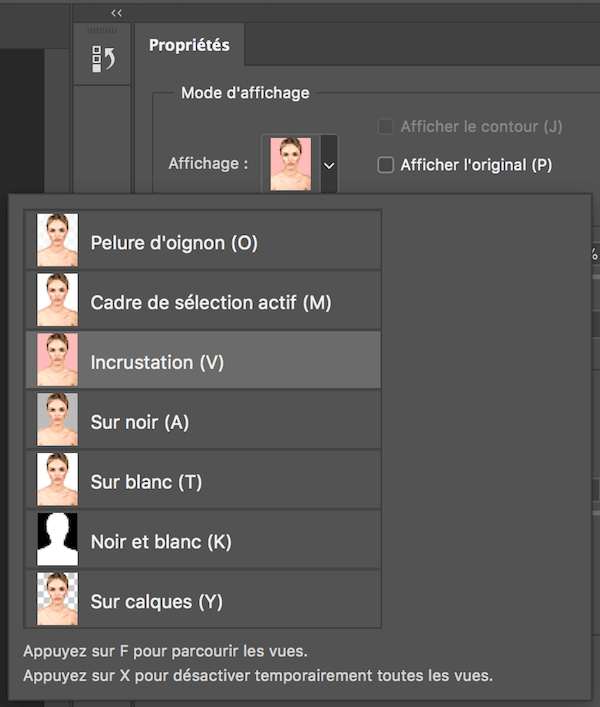
- Does the result on the different backgrounds suit you?
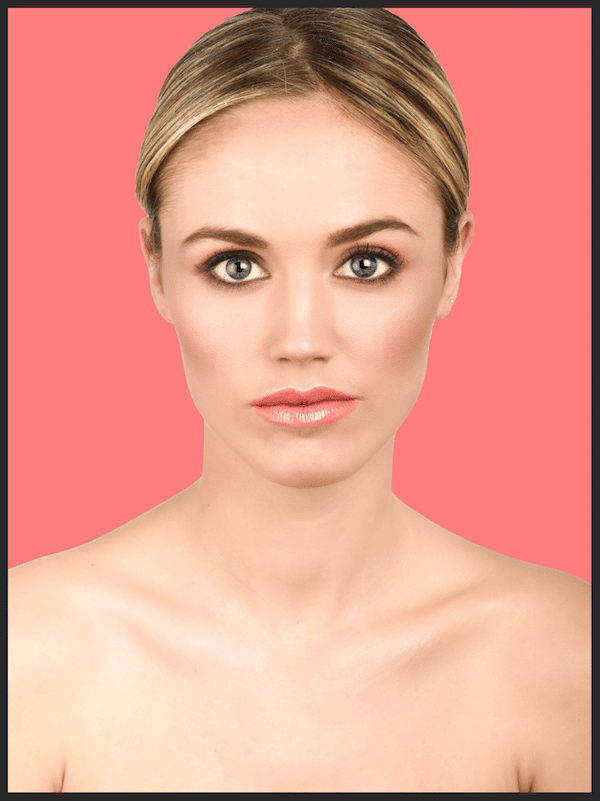
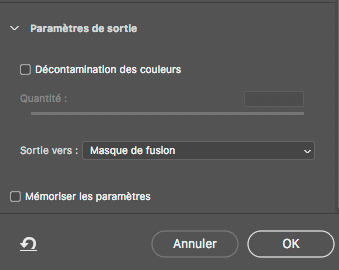
- Once the result is to your liking, choose “Output to merge the mask” and click OK at the bottom right. Your image is ready!
For more details on image cropping, we recommend this video.
Also read: Photoshop: 6 beginner mistakes to stop making Remove imperfections from an image in Photoshop
You will see how to easily erase objects or imperfections from a photo using Photoshop CC.
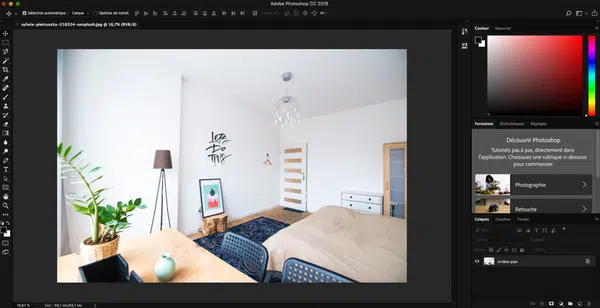
- First, open an image in Photoshop. Here, we will be able to easily erase the black writing on the wall.
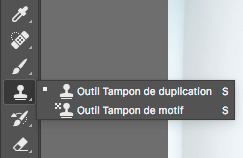
- Select the clone stamp tool from the Photoshop toolbar.
- In the top left of the Photoshop window, you can select the brush that suits you best: you can vary its size depending on the object you want to make disappear.
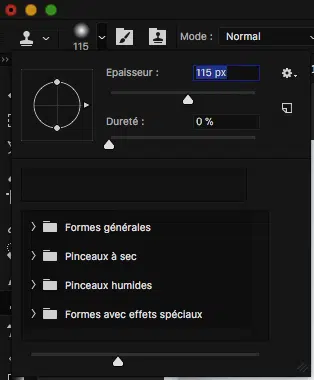
- Hold down the “alt” key and click on the white wall for example. The outline of your stamp should turn into a small target. Then, click on the black writing and you will see it gradually disappear. Photoshop duplicates the background you selected to the location of your choice. If you make a mistake, you can undo by pressing ctrl z on PCs or cmd z on MAC.
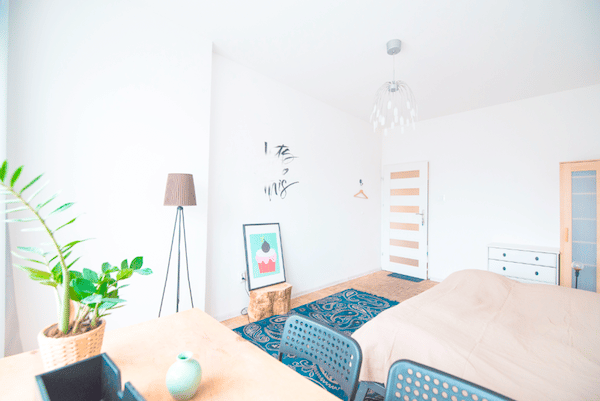
- See the result:
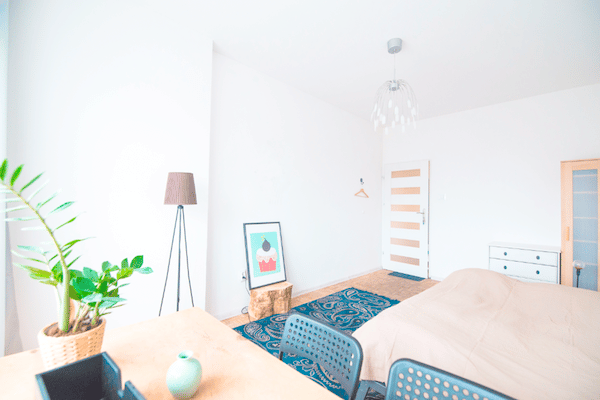
With this method, you can erase almost anything with a little patience and practice.
Using layers in Photoshop
Here, you will learn how to use adjustment layers in Photoshop CC with the simple example of the black and white layer.
Adjustment layers in Photoshop CC are rich in possibilities for enhancing your images. With Photoshop CC and in just a few seconds, you will be able to turn your photo into black and white and enhance the colors to your liking.
- Start by choosing an image and opening it in Photoshop
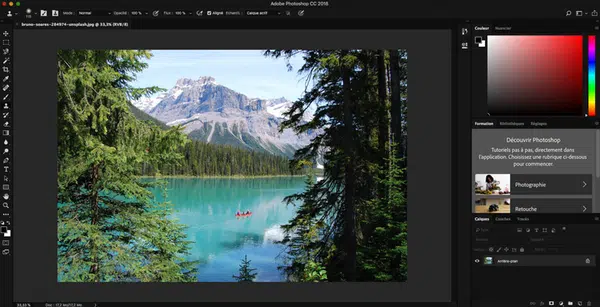
- Go to the Layer menu, then to New Adjustment Layer, click on Black and White, and then OK.
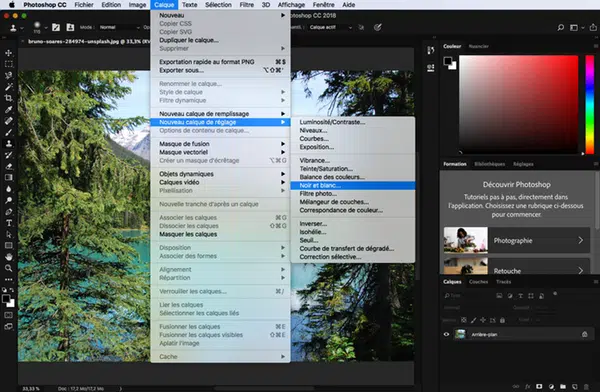
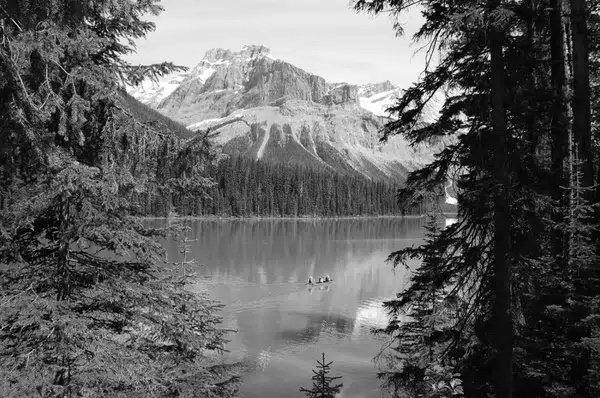
- Here is the image in black and white
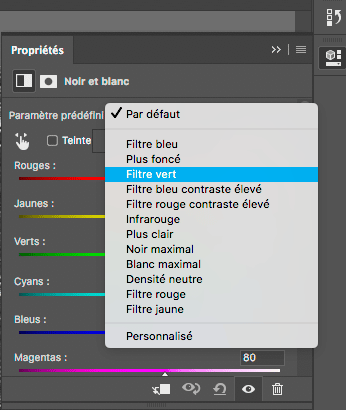
- Open the properties palette of the layer

- You can change the colors to your desire. Here, we will choose “green filter”.
- Here is the result:
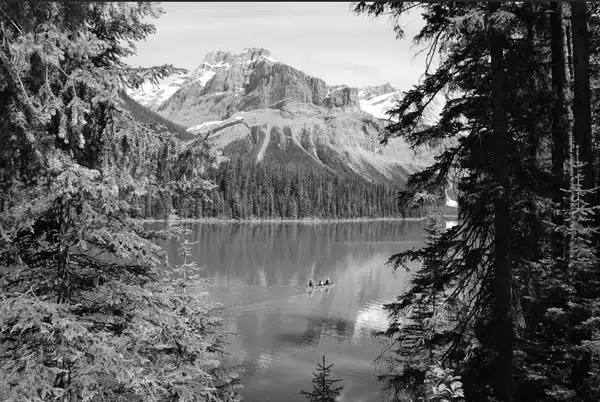
Adjustment layers in Photoshop CC allow you to quickly modify your images, including adjusting brightness and contrast, color balance, hue, and saturation of your images.
Everything you need to make basic modifications to your images can be found in this menu of the Photoshop software.
Saving an image for the web in Photoshop
To save an image for the web, you need to compress it so that it does not slow down your website. Here is the procedure to follow:
- Open your image in Photoshop
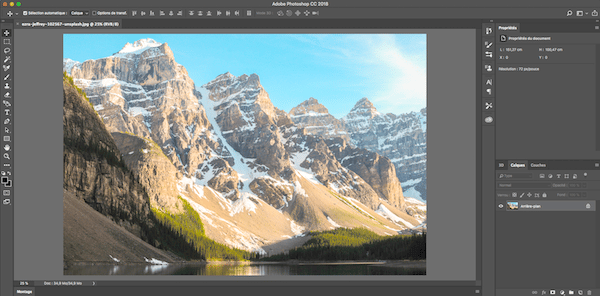
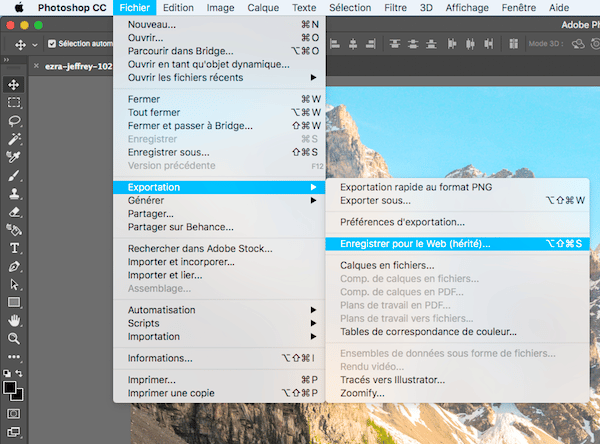
- In the “File” menu, click on “Export” and then on “Save for Web”. (legacy)
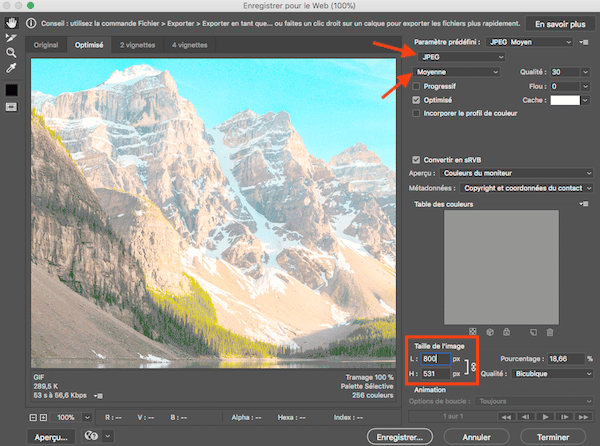
- In the window that appears, select jpeg as the compression format and adjust the image quality. Here, I chose a medium image quality. You can also adjust the image size to reduce its weight. Then click “Save”.
- The result

By resizing and compressing the image, we went from an image of 2.7 MB to just 71 KB while maintaining the correct display quality: perfect for illustrating your website without increasing the loading time of your webpage.
Resizing an image for the web in Photoshop
To resize an image with Photoshop, proceed as follows:
- First, open an image in Photoshop
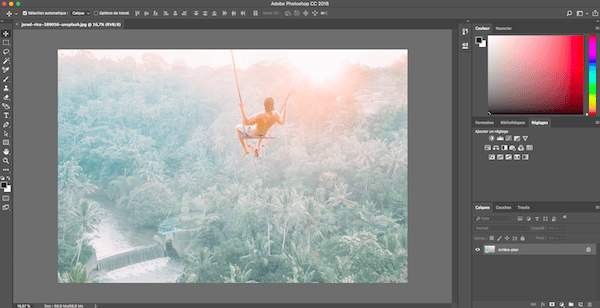
- Then, go to the image menu and click on “Image Size”.
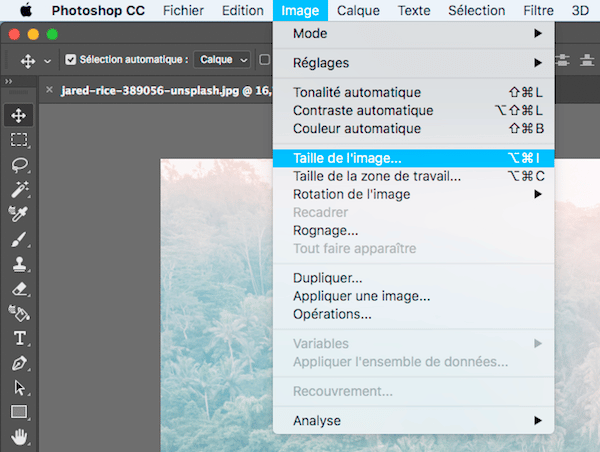
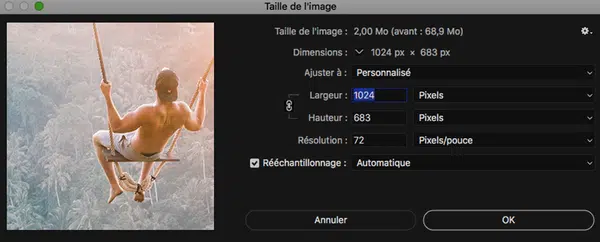
- We want to use this image for a website, so we need to resize it to fit the standard size of computer screens: 1024*768 pixels. Change the values and click “Ok”.
Automate your tasks in Photoshop
You will learn how to automate simple tasks with Photoshop CC.
Do you have dozens of photos to resize and compress? Why not do it with Photoshop CC in less than 5 minutes?
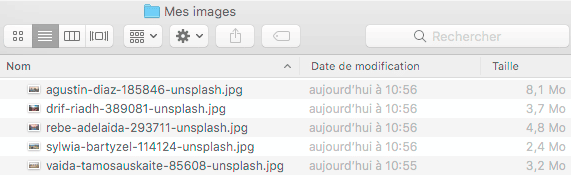
- Start by creating a folder on your computer and placing your photos there for editing
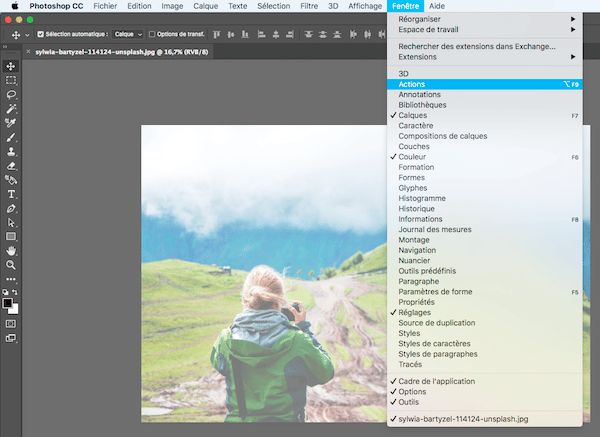
- Open a first photo with Photoshop and go to the “Window” menu to click on “Actions”.
- Create a new script by clicking on the small icon next to the trash can in the bottom right corner of the window. We will call it here: “resize and save for web”. Click on “Save”.
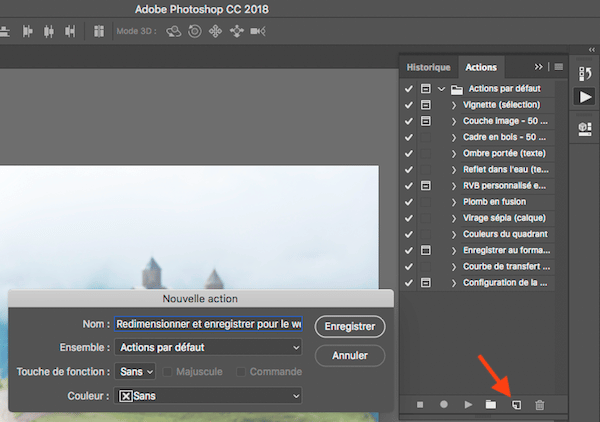
- Once the script is created, the Save button turns red. Perform all the operations you need to automate.
 Refer to the training course “Save an image for the web in Photoshop” and “How to resize an image for the web in Photoshop” to resize an image and save an image for the web. Don’t forget to close your image after performing your operations, it’s important for the future.
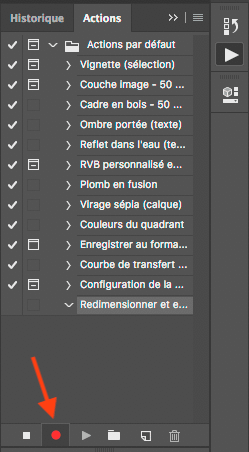 Refer to the training course “Save an image for the web in Photoshop” and “How to resize an image for the web in Photoshop” to resize an image and save an image for the web. Don’t forget to close your image after performing your operations, it’s important for the future.
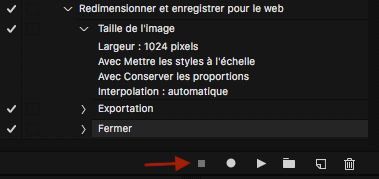
- Now, click on the “stop recording” icon at the bottom left of the script window. Your script should look like this:
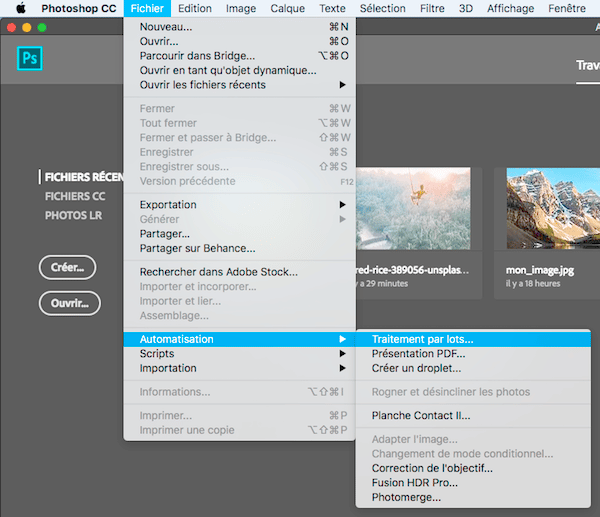
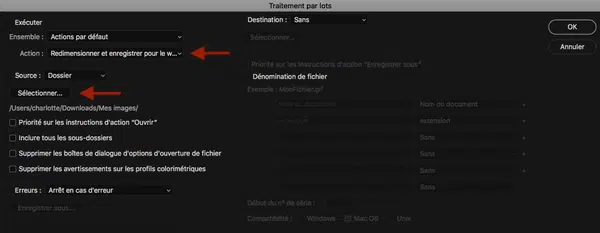
- You can now automate your operations: go to the file menu then “Automation” and click on “Batch Processing”.
- Select now the script you want to use and the folder where your photos are located. Click OK and in the blink of an eye all your photos will be resized and compressed.
After these ten Photoshop tutorials, you can now use many basic Photoshop functions.
Merging two images in Photoshop
In the first training, we cut out an image with Photoshop CC. Here, we will be able to merge it with a background.
- Start by opening your two images in Photoshop
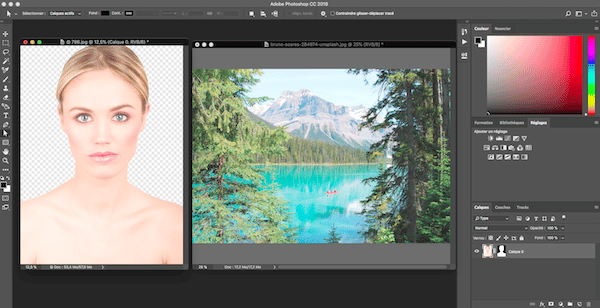
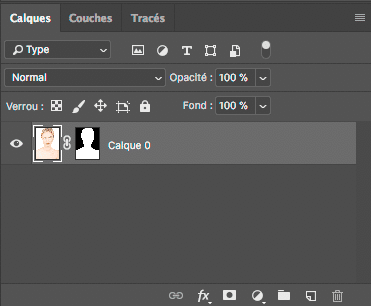
- Select the cropped image, then select the merge layer. Then, drag and drop the cropped image onto the background.
- To resize your image, press the shortcut cmd t on Mac or Ctrl t on PC and hold down the Shift key while resizing the image to maintain proportions.
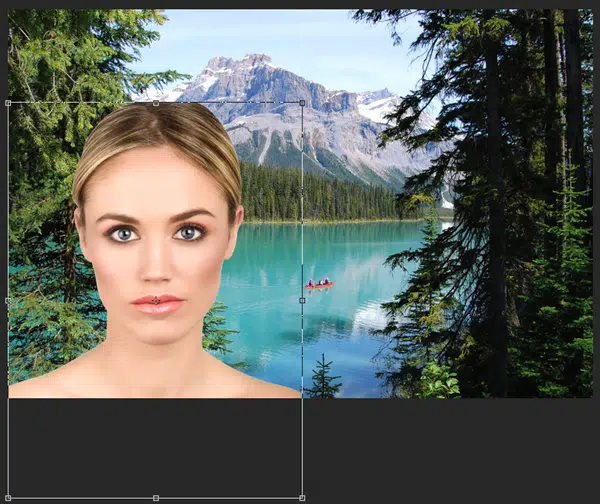
- Once your image has been resized and placed as you wish in the background, click on the “Validate” icon at the top of the screen.

Crop an image in Photoshop
Here’s how to crop an image using Photoshop.
Now that you know a bit more about the basics of Photoshop software: interface, resizing, and saving images, you are starting to edit images.
- Open your image in Photoshop
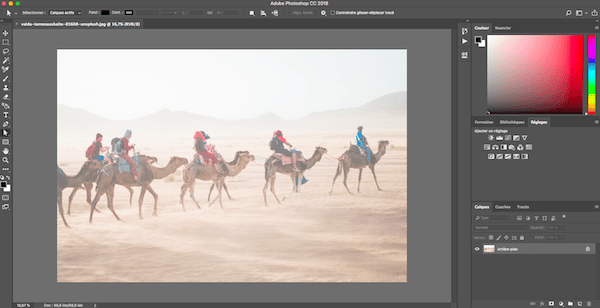
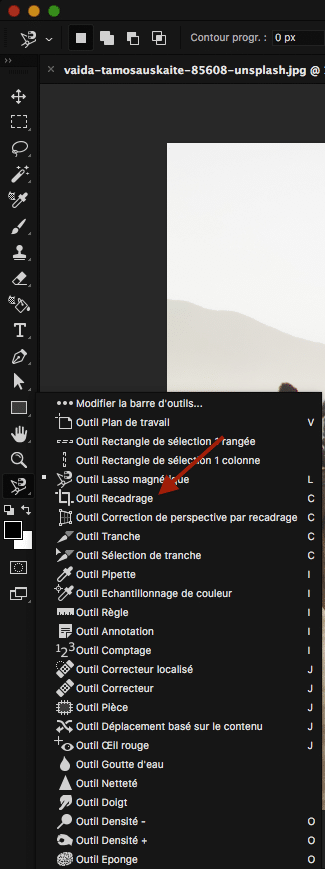
- Select the crop tool. If you cannot see this tool in the toolbar, click on the 3 small dots. You should see a list of all available tools, as shown in the image below.
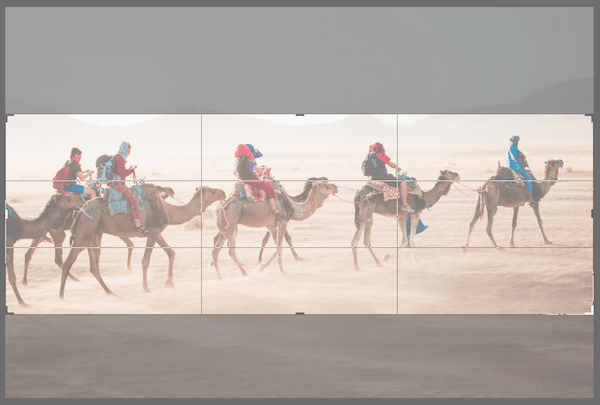
- Resize the area to crop. You can enlarge or refine the cropping area with the ends of the frame.
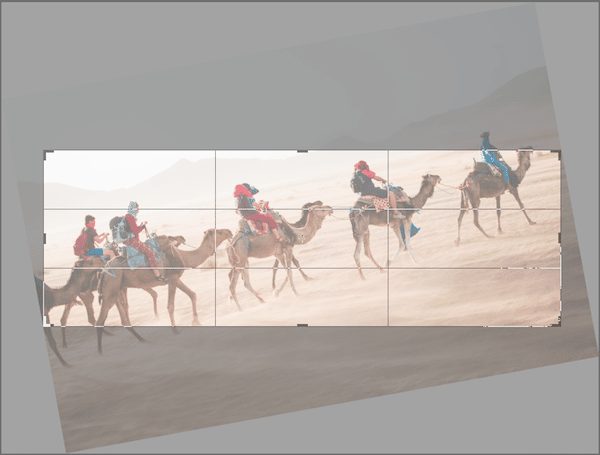
- It is also possible to tilt the cropping area when the arrow of your mouse curves.
- Once your cropping is to your liking, click on the “Validate” icon at the top of the screen.

- And here is the result:
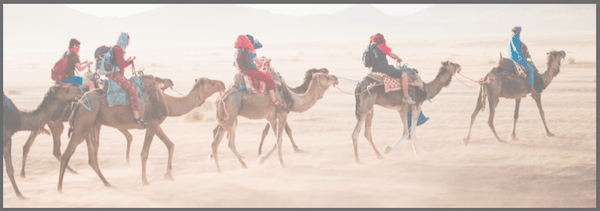
Nothing simpler, right?
Image processing: our best Photoshop tutorials
Change the color of an object in Photoshop
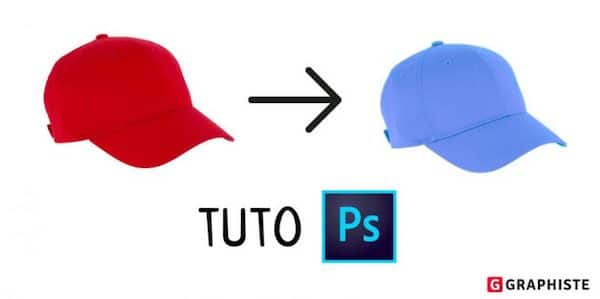
Are you wondering how to change the color of an object in Photoshop?
Here are two simple ways to change the color of an object in Photoshop, one very simple and quick, the other longer but also more precise.
See the article 👉🏼 How to change the color of an object in Photoshop?
Cut out a clothing photo with Photoshop
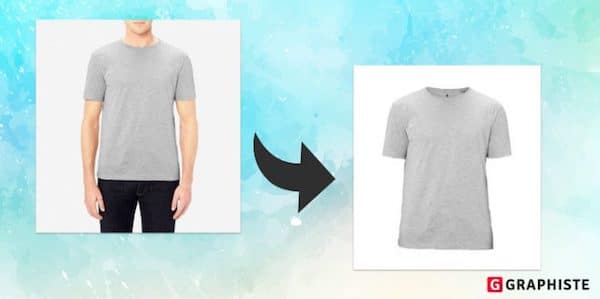
To highlight your product photos, it is possible to give a clothing photo a “dressed void” effect, beautifully imitating the wearing of a mannequin while hiding its presence.
Follow our tutorial to do this using Photoshop.
See the article 👉🏼 How can I cut out a clothing photo with Photoshop?
Remove an object from an image
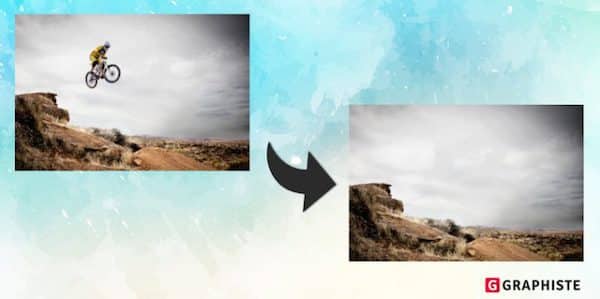
Is your latest photo spoiled by a small detail you would like to see disappear? Don’t panic, it’s easy to fix with the help of Photoshop.
Here is a simple technique that allows you to remove an object from an image in just a few steps.
See the article 👉🏼 How can I remove an object from an image?
Blur a part of an image with Photoshop
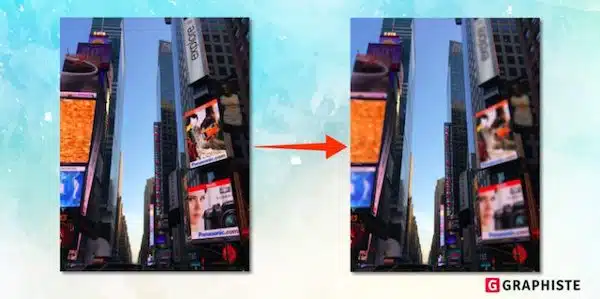
In this tutorial, we present simple techniques to apply a blur effect to a specific location.
We will first see how to simply blur a face, then how to blur a rectangular element in perspective.
See the article 👉🏼 How to blur a part of an image with Photoshop?
Change eye color in Photoshop

Do you want to add a unique touch to a portrait by changing the eye color of the subject?
In this step-by-step tutorial, we provide you with a simple method to change eye color with Photoshop.
See the article 👉🏼 How to change eye color in Photoshop?
Aging a photo in Photoshop
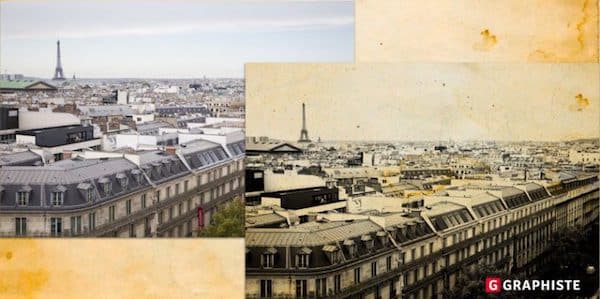
With Photoshop, it is very easy to transform a recent photograph into an old photo with yellowed paper.
In this tutorial, we present a method for aging a photo in Photoshop.
See the article 👉🏼 How to age a photo in Photoshop?
Our Photoshop tutorials for your business
Integrate a logo in perspective in Photoshop
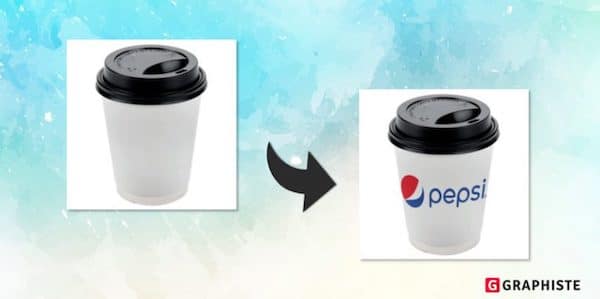
Do you have a beautiful new logo? Then why not put it in context in your visuals by incorporating it into objects?
Learn how to insert a logo in perspective on a flat or rounded surface using Photoshop.
See the article 👉🏼 How to integrate a logo in perspective in Photoshop?
Emboss a logo on a t-shirt in Photoshop

Do you want to visualize your logo on a t-shirt realistically?
You’re in luck: here’s a simple way to embed a logo on a t-shirt in Photoshop.
See the article 👉🏼 How to embed a logo on a t-shirt in Photoshop?
Create an animated logo with Photoshop
Animating a logo is entirely possible with Photoshop!
With this very simple tutorial, discover the different animation possibilities.
See the article 👉🏼 How to create an animated logo with Photoshop?
Make a GIF in Photoshop

Do you want to create a GIF to decorate your website or share on social media?
Discover two simple ways to create a GIF in Photoshop: one from images and the other from video.
See the article 👉🏼 How to make a GIF in Photoshop?
Create a brochure with Photoshop

In this tutorial, you will learn how to create a complete template in Photoshop (whether it’s a 2 or 3-part brochure) so that you can design your flyer under the best conditions.
See the article 👉🏼 How to create a brochure with Photoshop?
4.9/ 5(11 votes )
Tag: alternative software to Photoshop